| Miscellaneous tips for 3dsmax by FP
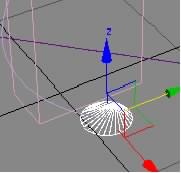
Vertex handles :
*If you want to have separate handles for a vertex but you want them to target the next vertex, to have a straight line coming out of them, convert the vertex to "corner" and then to "bezier". The handles will have moved to target the next vertex.
*When you convert from "bezier corner" or "corner" to "bezier", sometimes the handles are aligned but not of the same size. To repair that, convert the vertex to "smooth" and then to "bezier", and the segments will be smoothed properly, with the tangents still editable.
*At the contrary, to resize one tangent by leaving the two ones of a vertex aligned, convert the vertex to "bezier corner", then rescale the needed tangent, and then return the vertex to "bezier". The handles will be 100% aligned but not with the same length.
Meshmooth and spline-based modelling :
If you try to meshmooth and object that come from an extruded spline, you'll surely get a weird rippled mesh, this is because of the way the caps are created when you extrude a spline. To avoid that, try to have as many polygons on the sides of the mesh as on the caps (decrease the interpolation steps count of the spline), avoid to have too many segments coming from the same vertex, and try to use the "relax" modifier to repair the sharp meshes. But the best is usually to convert the line into a poly editable, to make a proper grid of polygons on it and then to "extrude" that form with the excellent "Meshtools - Solidify" plugins (R3/R4 only a the moment) or more hardly with a face extrusion on a copy of the form, followed with a vertex welding and an unification of the polygon normals.
3DS Max Tutorial: Low Poly "Creeping" Plants by DF
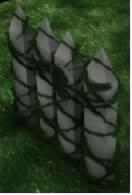
After working on a part of the Citadel island recently, I came accross a problem.
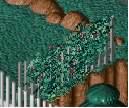 |
Dotted around some of the fences are vine-like plants, which actualy proved very hard to model in any reasonable way. |
I tried many things, and while some of them ended up looking half decent, the polygon count on those were unacceptably high.
Luckily I found a method that produces resonable looking plants, while having a very low poly count.
It is a compromise, however, as it dosnt look so much like the games one.
Heres how to do it:
1 . Hide all objects except the one you want the
vine to rap around, and the ground:
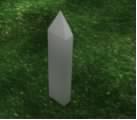 |
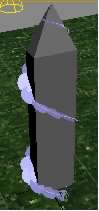
2 . Create a spline of some sort rapping around the object...I found a Helix is the best to use normaly. Adjust it so it "wraps" around the object neatly, leaving a slight gap: |
3. Turn on "snap to vextex", and turn off any other snaps.
4 . Create a small cricle from the bottom vertex of your helix (or whatever your spline was).Then add an Edit Mesh modifier:
5. Now add a UVW MAPPING modifier on top. (Set to Planer maping)
6. Select the circle if its not already selected, goto
Tools>>Spacing Tools then click on "pick path"...select the helix/spline.
Tick the "follow" option.
Next change the count amount from 3.
Increase it until all the circles are overlapping by a small amount.
Change type of object to "Instance".
When your happy with the way it looks click "apply":
7. Now for the all-important material.
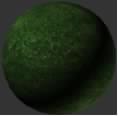
Select a standared material, and add a grass/greenary texture too it on the Diffuse channel:
8. Go to the opacity option an change it too "Gradient Ramp".
Edit the gradient as showen, (changing the interpolation to "solid and ed iting the points).
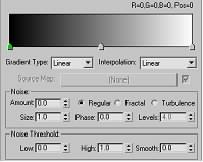 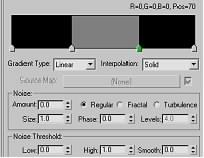
9. Add Noise to taste (you want the edges of the strip "rough"
10 . Change the angle of the opacity to 90,
11 . Then apply it to the circles:
You should have something like this:
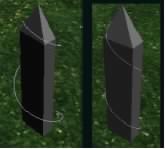
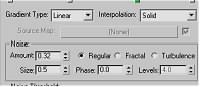
12. To fine tune this, increase the circles size in the stack:
Check the polygon count at this time too. Its still probably a bit too high, so change the interpolition of the circle down . This will reduce the polygon count a lot, yet it will look the same! See :
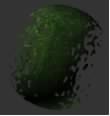
Now, you basicaly have a low polygon crawling plant :))
Obviously you might want to repeat this two or three times ot make it more bushy...and many add little red spots (small circles, facing away from the fence, or whatever...dont use spheres...pointless waste of polys).
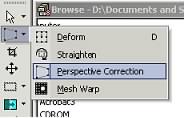
Paint Shop Pro 8: Perspective Correction by DF
(PSP8 available from www.jasc.com)
A quick and simple tutorial using an excellent new tool that will become essiential for anyone wanting to make textures from photos :)
1. Take your picture:

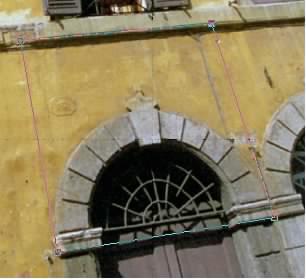
2 . Now, theres lots of nice textures in this pic, but the problem is there all at the angle of the building. Previously in PSP, or any other painting program you would have to manualy screw and distrort it till it fits a neat square.
Now, the "perspective correct" tool makes it simple.
Click on it :
3. Now move the points about so they form a square face on the landscape.
Align them the edges match up with real edges in the landscape in example:
4 . Then click the tick button and like magic... 

Its all adjusted to face you "flat on" :)
You can now crop bits for textures as you see fit.
Remember though, it works best around the area you picked as a guide, the rest will have a slight distortion.
|